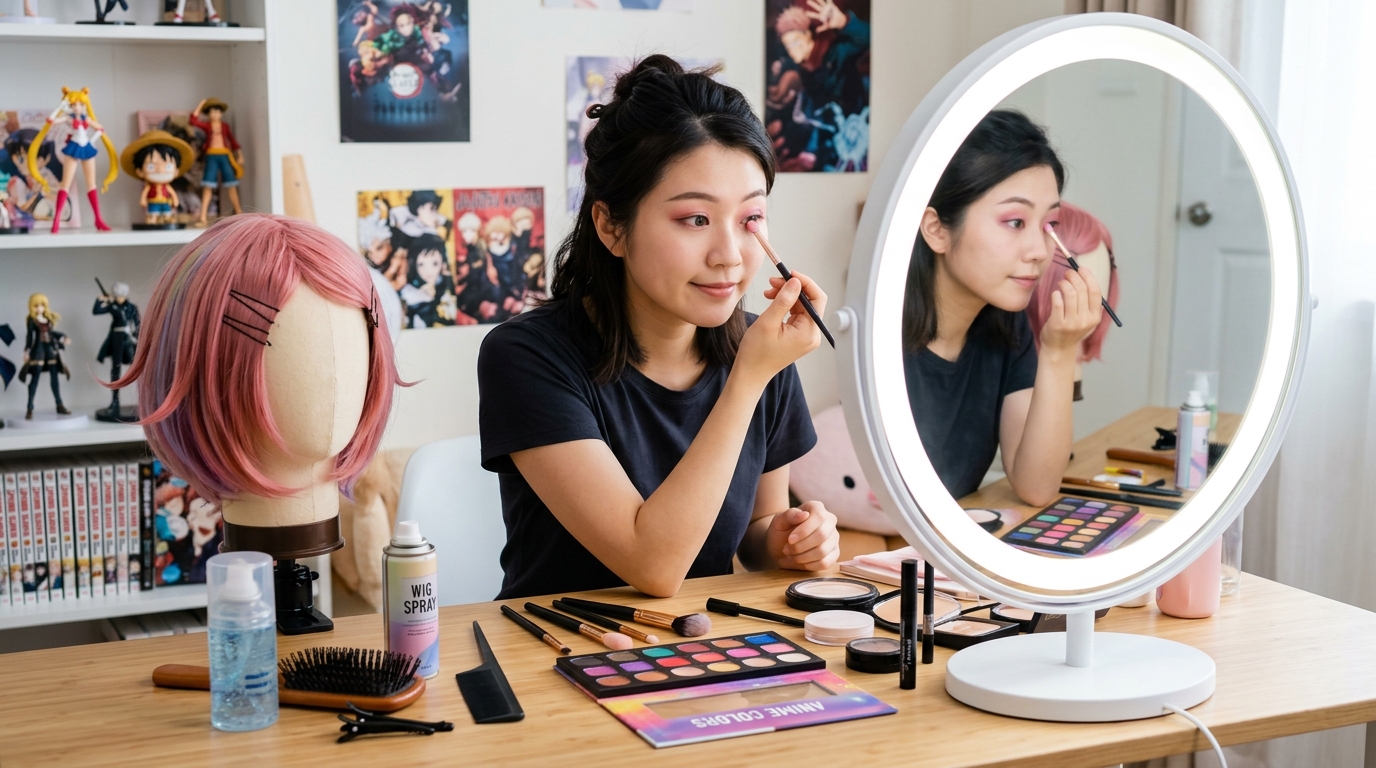
You’ve picked your character, ordered your costume, and now you’re staring at a makeup kit and synthetic wig wondering where to start. Good news: transforming into your favourite anime character doesn’t require professional training or expensive equipment. With the right techniques and a bit of practice, you can create stunning character looks that’ll turn heads at your first convention.
Mastering cosplay makeup and wig styling for beginners starts with understanding your character’s features, using proper tools, and practising basic techniques. Focus on foundation matching, eye shape modification, contouring for anime features, wig preparation, cutting, and heat styling. Start simple, build skills gradually, and always test your look before convention day to avoid last-minute disasters.
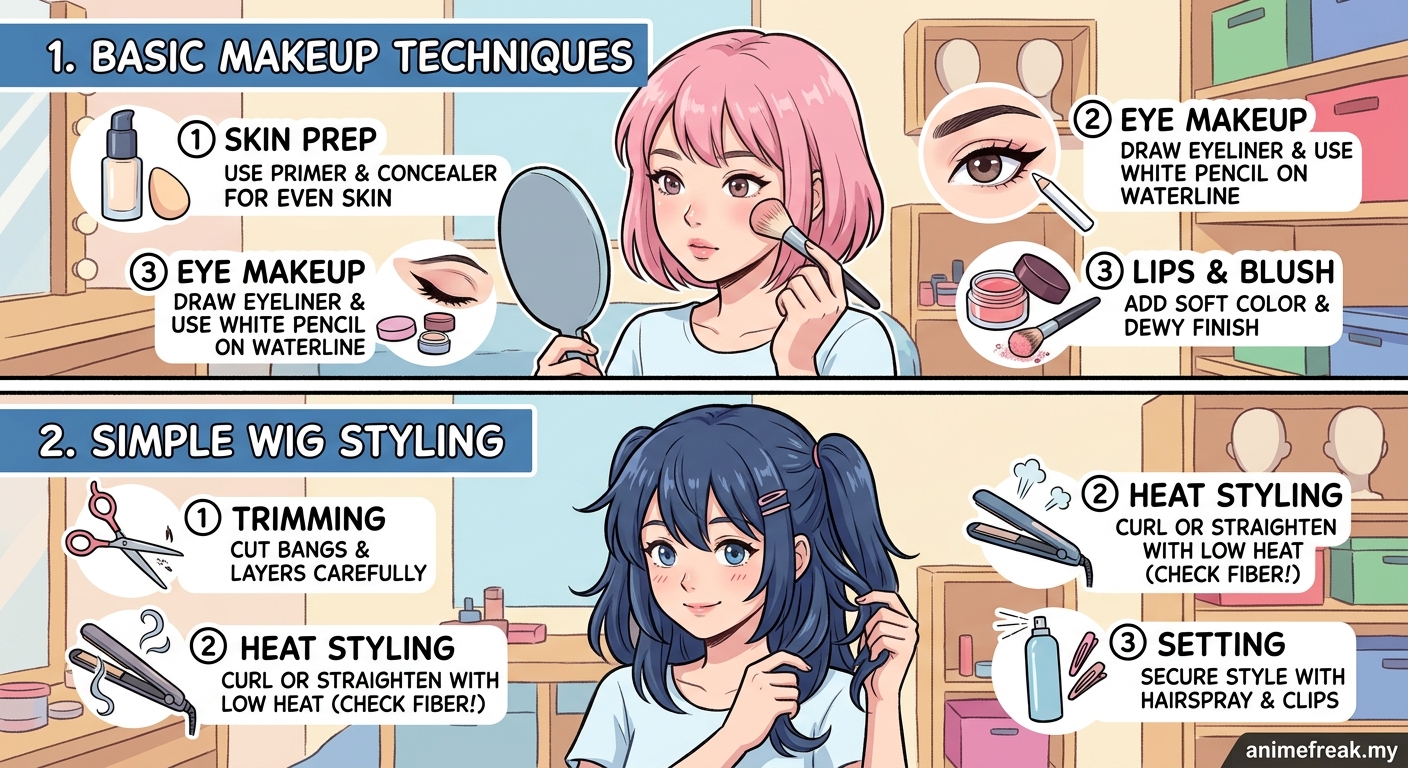
Understanding character makeup fundamentals
Character makeup differs completely from everyday makeup. You’re not enhancing your natural features. You’re creating an entirely different face.
Start by studying reference images of your character. Screenshot multiple angles from the anime. Notice eye shape, eyebrow thickness, face shape, and any unique markings. Print these images or save them to your phone for constant reference whilst applying makeup.
Anime characters often have exaggerated features. Large eyes, small noses, sharp jawlines, and perfectly smooth skin. Your makeup needs to create these illusions using colour, shadow, and light.
Foundation becomes your blank canvas. Choose a shade that matches your character, not necessarily your skin tone. Many anime characters have porcelain-pale or unnaturally warm complexions. Apply foundation generously, extending down your neck and onto visible chest areas to avoid a mask-like appearance.
Setting powder is non-negotiable. Convention halls get hot. You’ll sweat. Without proper setting, your carefully applied makeup will slide off within an hour. Use translucent powder and apply liberally with a fluffy brush or powder puff.
Essential makeup tools and products
You don’t need a professional kit to start. Focus on these basics first:
- Foundation in your character’s skin tone
- Concealer one shade lighter for highlighting
- Setting powder (translucent works for most characters)
- Eyeshadow palette with browns, blacks, and your character’s signature colours
- Black and brown eyeliner (both pencil and liquid)
- False eyelashes (dramatic ones for anime eyes)
- Eyebrow pencil or pomade
- Contour powder or cream
- Makeup brushes (at minimum: foundation brush, powder brush, eyeshadow brushes, angled brush)
- Makeup sponges
- Setting spray
Buy affordable brands when starting out. Many drugstore products perform just as well as expensive alternatives. Test products before convention day to check for allergic reactions and colour accuracy.
Store your makeup in a dedicated bag or case. Convention bathrooms get crowded. Having everything organised means faster touch-ups between photo sessions.
Creating anime-style eyes with makeup
Eyes define anime characters. Getting them right makes or breaks your cosplay.
Step 1: Enlarge your eye shape
Apply white or nude eyeliner to your waterline (the inner rim of your lower lid). This makes your eyes appear larger instantly.
Step 2: Modify your eye shape
Use black eyeliner to redraw your eye shape. Extend the line beyond your natural eye corners. For characters with droopy eyes, angle the line downward. For cat-like characters, flick upward dramatically.
Don’t follow your natural eye shape. Follow your character’s eye shape. This takes practice and feels weird at first, but the transformation is worth it.
Step 3: Add dimension with eyeshadow
Apply your character’s signature eyeshadow colour on the lid. Blend a darker shade into the crease for depth. Anime eyes often have minimal shading, so keep it simple.
Add a lighter shade or shimmer to the inner corner and centre of the lid. This creates the bright, sparkly effect common in anime art.
Step 4: Apply false lashes
False lashes are essential for anime eyes. Choose dramatic, long lashes. Trim them to fit your eye shape, apply lash glue, wait 30 seconds for it to get tacky, then press them onto your lash line.
Some cosplayers stack two pairs of lashes for extra drama. Try this once you’re comfortable with single pairs.
Step 5: Add lower lashes
Draw individual lower lashes with liquid eyeliner or apply lower false lashes. Space them out more than natural lashes for that illustrated look.
“The biggest mistake beginners make is trying to keep their natural eye shape. Anime characters don’t have realistic proportions. You need to completely redraw your eyes to match the character, even if it looks strange up close. It photographs beautifully.” – Veteran cosplayer with 10 years experience
Contouring for character face shapes
Contouring creates illusions. Sharp jawlines. Smaller noses. Higher cheekbones. All achievable with strategic shading.
For typical anime characters, you’ll want to:
- Slim your nose by drawing two thin lines down the sides with contour powder or cream
- Sharpen your jawline by contouring under your jaw and blending downward
- Hollow your cheeks by sucking them in and applying contour in the hollow, blending upward
- Minimise your nose tip by adding contour to the very bottom of your nose
- Add highlight down the centre of your nose, on your cheekbones, and on your chin
Blend everything thoroughly. Harsh lines photograph poorly and look costume-like in person.
Male characters need different contouring. Stronger jawlines, more prominent brows, and less cheek definition. Study male face structure and adjust your technique accordingly.
Preparing your wig before styling
Wigs arrive tangled, shiny, and shapeless. Preparation makes the difference between a RM50 wig and a RM500 wig.
Remove from packaging carefully
Turn the wig inside out and shake it gently. Don’t yank or pull. Synthetic fibres tangle easily when handled roughly.
Detangle systematically
Start at the ends, never the roots. Use a wide-tooth comb or wig brush designed for synthetic hair. Work in small sections, holding the hair above where you’re brushing to prevent pulling at the wefts.
For stubborn tangles, use silicone-based wig detangler spray. Never use regular hair conditioner on synthetic wigs unless the manufacturer specifically states it’s safe.
Reduce shine
Most synthetic wigs have unnatural shine. Fix this by:
- Sprinkling baby powder or dry shampoo through the wig, then brushing it out
- Lightly spraying with matte setting spray
- Using fabric softener mixed with water (test on a small section first)
Wash if necessary
If your wig smells like chemicals or feels stiff, wash it in cold water with mild shampoo. Soak for 5-10 minutes, rinse thoroughly, and air dry on a wig stand. Never wring or twist synthetic wigs.
Basic wig styling techniques
Styling transforms a basic wig into your character’s signature hairstyle. These techniques cover most beginner needs.
| Technique | Best For | Tools Needed | Difficulty |
|---|---|---|---|
| Trimming | Adjusting length, cutting bangs | Sharp fabric scissors, clips | Easy |
| Teasing | Adding volume, creating spikes | Rat tail comb, hairspray | Easy |
| Heat styling | Curls, bends, straightening | Heat gun, curling iron (low temp) | Medium |
| Spiking | Spiky anime hair | Got2b Glued spray, blow dryer | Medium |
| Wefting | Adding length or volume | Needle, thread, extra wefts | Hard |
Trimming your wig
Put the wig on a wig head or your own head. Secure with clips. Cut small amounts at a time. You can always cut more, but you can’t add hair back.
For bangs, cut longer than needed first. Check the length, then trim more if necessary. Wet the hair slightly to prevent flyaways whilst cutting.
Creating volume and spikes
Section the hair you want to spike. Backcomb (tease) from the tips toward the roots. Spray heavily with strong-hold hairspray. Blow dry whilst shaping with your hands.
For extreme spikes, use Got2b Glued spray or hair gel. Apply to the section, shape it, and blow dry until completely stiff. Layer more product if needed.
Heat styling synthetic wigs
Not all synthetic wigs can handle heat. Check the product description for “heat resistant” or “heat friendly” labels.
For heat-resistant wigs, use low temperatures (below 150°C). Test on a small hidden section first. Style in small sections, holding the heat tool briefly and moving constantly.
Regular synthetic wigs will melt with heat. Use foam rollers and hot water instead: wrap damp hair around rollers, pour hot (not boiling) water over them, and let cool completely.
Common mistakes and how to avoid them
Learning from others’ mistakes saves time, money, and convention day stress.
Mistake 1: Skipping primer
Primer creates a barrier between your skin and makeup. Without it, foundation oxidises (changes colour), settles into pores, and disappears faster. Always prime, even if you have perfect skin.
Mistake 2: Wrong foundation shade
Testing foundation in store lighting doesn’t show true colour. Swatch on your jawline and check in natural light. For character accuracy, you might need a shade different from your skin tone, but it should still look intentional, not mismatched.
Mistake 3: Cutting wigs whilst wearing them
Scissors near your face and eyes? Dangerous. Always use a wig head for major cutting. Minor trims can be done whilst wearing the wig, but proceed with extreme caution.
Mistake 4: Using too much product
More product doesn’t mean better hold. It means sticky, crunchy, heavy hair that photographs poorly. Build up gradually. You can always add more.
Mistake 5: Not testing your look beforehand
Convention morning is not the time to discover your foundation oxidises orange or your wig cap shows through. Do a complete test run at least one week before the event. Photograph it in different lighting. Make adjustments.
Mistake 6: Forgetting to set makeup
Setting spray is your best friend. After completing your makeup, hold setting spray 20-30 cm from your face and mist in an X and T pattern. This locks everything in place for hours.
Maintaining your look throughout the day
Conventions last 8-12 hours. Your makeup and wig need to survive that long.
Pack a touch-up kit with:
- Blotting papers (remove oil without disturbing makeup)
- Pressed powder for quick touch-ups
- Your lip colour
- Small bottle of setting spray
- Bobby pins for wig emergencies
- Small brush or comb
- Tissues
Blot your face every 2-3 hours, especially your T-zone. Reapply powder where needed. Refresh setting spray after eating or drinking.
For wigs, check the cap edges periodically. Tuck away any visible cap with bobby pins. Smooth flyaways with a small amount of hairspray on your hands.
Avoid touching your face. Every touch transfers oil and breaks down makeup. If you need to adjust something, use a tissue or clean hands.
Building your skills over time
Your first cosplay makeup won’t be perfect. That’s completely normal and expected.
Start with characters that match your natural features. If you have large eyes, choose a character with large eyes. If you have a round face, pick a character with a round face. This reduces the transformation needed and builds your confidence.
Practice each technique separately before combining them. Spend one evening just practising eyeliner. Another evening on contouring. Another on wig styling. Breaking it down makes the learning process less overwhelming.
Take photos of every practice session. Compare them. Notice what improved and what needs work. Progress happens gradually, but photos show just how far you’ve come.
Watch video tutorials from experienced cosplayers. Seeing techniques in motion helps more than static images. YouTube has thousands of character-specific tutorials.
Join cosplay communities online. Share your work, ask questions, and learn from others. The cosplay community is generally welcoming and helpful to beginners who show genuine interest in learning.
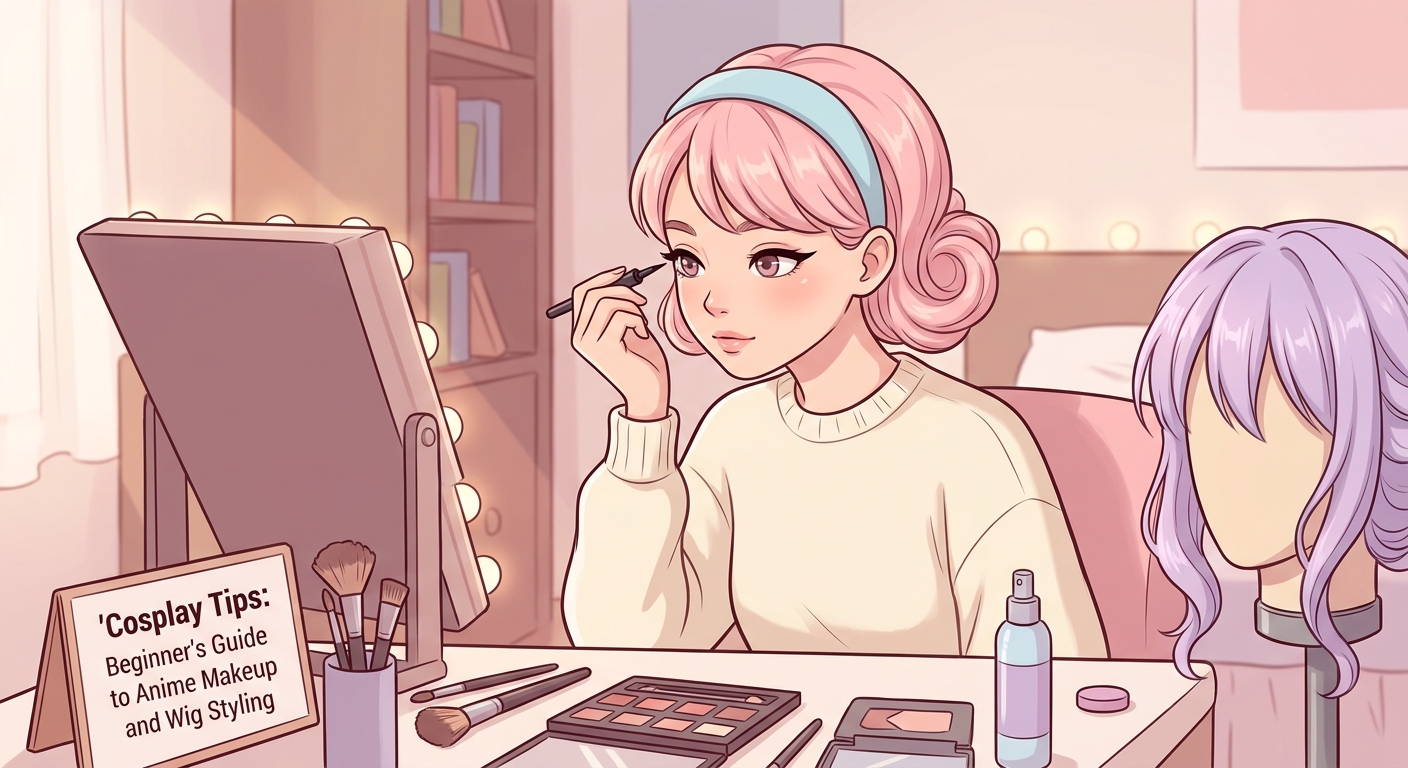
Your character transformation starts here
Cosplay makeup and wig styling for beginners might seem intimidating at first glance, but every expert cosplayer started exactly where you are now. They made mistakes, learned techniques, and improved with each convention. The difference between a beginner and an expert is simply practice and patience.
Start with basic techniques and gradually add complexity as your confidence grows. Focus on understanding your character’s features rather than perfectly replicating every detail immediately. Your first cosplay teaches you what works for your face shape, skill level, and available time. Your second cosplay builds on those lessons. By your third or fourth, you’ll wonder why you ever found it difficult.
Grab your makeup brushes and wig. Put on some music, pull up your reference images, and start practising. The character you want to become is waiting on the other side of that mirror.